This post may contain affiliate links which means we may receive a commission for purchases made through links. Learn more
Building a soundproof area is an awesome idea. The ability to practice/work on your drums at any hour is nearly impossible without soundproofing room for drums. Drums can reach volumes of 100 dB or more and produce one heck of a bass – seriously, they’re the ultimate soundproofing challenge. Building this noise-free studio won’t be easy; you’ll have to face both airborne noise (the sound waves themselves) and structural noise (vibrations moving through solid materials). But don’t sweat it! This guide is here to help you out with the most important steps and materials you’ll need to turn your home studio into a soundproof room for drums.
- Understanding the Core Principles of Soundproofing
- Choosing the Right Spot
- Soundproofing the Walls
- Soundproofing Windows
- Soundproofing Doors
- Soundproofing the Floor and Ceiling
- Keeping It Cool: Heating, Cooling, and Ventilation
- Beyond Soundproofing: Making Your Studio Sound Great
- Bonus: Temporary Soundproof Barrier

Understanding the Core Principles of Soundproofing
Before jumping into the boring specifics, it’s crucial to understand the basics of soundproofing:
- Mass: The heavier and denser a material, the more effectively it blocks sound. Think concrete, multiple layers of thick drywall (way easier!), and specialized mass loaded vinyl.
- Decoupling: This is all about stopping bass and vibrations from moving from one surface to the next. The best way to do this is by creating air gaps or spaces. You can also use resilient materials like rubber or foam, along with special clips that physically separate noise barriers. Remember, even a single screw or a direct connection can completely undermine your entire soundproofing effort.
- Damping: This is about converting sound energy into heat. Materials like Green Glue and specialized insulation really help to minimize vibrations within wall spaces.
- Airtightness: Sound travels through the smallest cracks and gaps. Sealing every opening, no matter how tiny, is critical. Think of sound like water – if water can get through, so can sound.
Ignoring any of these basic principles can totally ruin or severely dampen your soundproofing efforts. As one expert puts it, drum soundproofing is more challenging because it requires addressing both airborne noise (the sound of sticks hitting heads) and structural noise (vibrations traveling through the building’s framework) simultaneously.
Choosing the Right Spot: Where to Build Your Soundproof Sanctuary
Listen up! The starting point for your awesome soundproof drum room is picking the right location. It makes a huge difference!
- Building from Scratch in Your Backyard: This is like hitting the jackpot for soundproofing. You get total control over the build and isolation right from the get-go.
- Detached or Attached Garage: Often, these bad boys already have a solid concrete floor, which is a fantastic head start for killing those bass vibrations.
- Basement: Being underground helps with some outside noise, but you’ll need to pay extra attention to stopping sound from heading upstairs.
No matter where you choose, having a solid, massive concrete floor is pure gold. Its sheer weight is amazing for blocking sound, making it the perfect base for your drumming fortress.
Soundproofing the Walls: Building a Serious Sound Barrier
Your walls are gonna be your main line of defense against those drum beats escaping. Here’s how to make them rock-solid:
- Tear Out That Old Drywall: To do this right, you gotta get ruthless. Rip out the old drywall so you can get to the bare studs. This lets you properly treat the inside of the wall and get serious about soundproofing.
- Double Walls or Resilient Channels: Your Decoupling Superpowers:
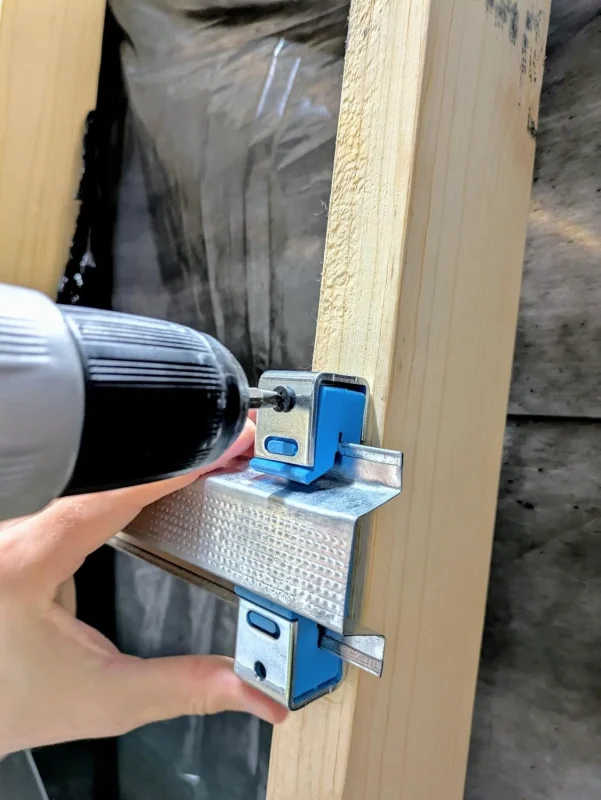
- Double Walls (The Gold Standard): If you’re going for maximum isolation, this is it. You build a brand new inner wall, leaving at least a 1-inch air gap between it and the outer wall. That air gap is the secret sauce for breaking sound waves. If you connect this inner wall to anything existing (like roof rafters), make sure you use special decoupling clips (like IB3 clips) to prevent vibrations from jumping across.
- Resilient Channel (A Killer DIY Option): If a full double wall is too much, these metal channels are your next best friend. You screw them perpendicular to your studs, then attach your drywall to the channels. This creates a small air gap, stopping vibrations from cruising straight thro4ugh the wood into the next room. Big warning: Don’t, and I mean don’t, accidentally screw through the resilient channel into the stud. One little screw can totally mess up all your decoupling efforts!
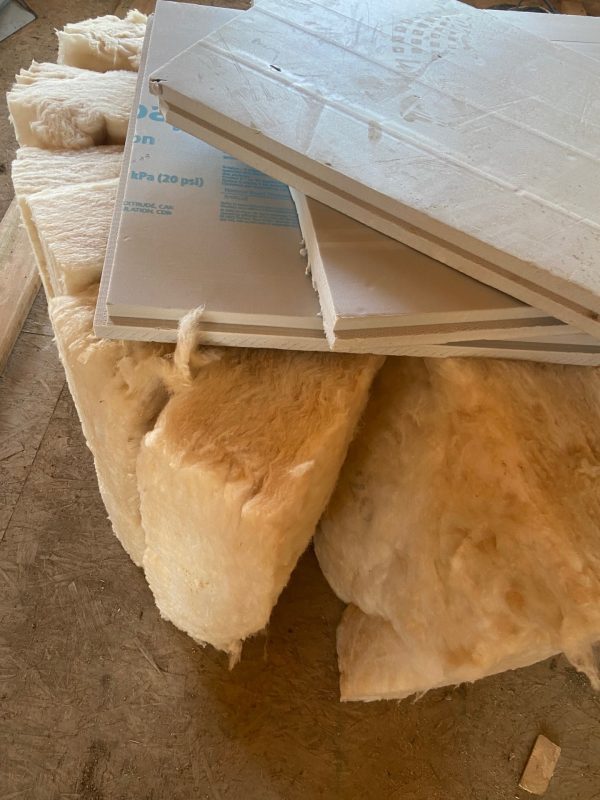
- Insulation: More Than Just Keeping Warm: Fill those wall cavities with the right stuff.
- Acoustical Sound Deadening Insulation: Forget the flimsy pink stuff for serious soundproofing. Mineral wool insulation is way better. It’s super dense and amazing at dampening both noise and vibrations, especially for drums. Regular fiberglass can work if you’re mindful of R-value for temperature, but mineral wool is the champ here.
- Layer Up! Drywall and Mass Loaded Vinyl (MLV): Your Mass Attack!
- Thick Drywall: Don’t be cheap here. Go for two, or even three, layers of the thickest 5/8-inch drywall you can get. (pro tip get the fire guard stuff) More mass equals more sound blocking power.
- Green Glue Damping Compound: This stuff is like magic goo. Squiggle an S-shaped bead of Green Glue between each layer of drywall. It’s a special compound that turns sound energy into heat, boosting your wall’s sound isolation like crazy. Let it dry between layers.
- Stagger Those Joints: When putting up multiple drywall layers, make sure the seams don’t line up. Staggering them prevents sound from sneaking through a straight crack.
- Mass Loaded Vinyl (MLV): Want even more soundproofing? Get some heavy MLV (2 pounds per square foot is awesome) and stick it on your studs before the drywall, or between drywall layers. This stuff is dense and flexible, acting as a double-whammy sound blocker and absorber, which is super important for those low drum frequencies. Tip: smaller rolls are easier to handle for a DIY job.
- Seal It Up! Acoustical Sealant is Your Best Friend: Seriously, this is HUGE. Sound will find any opening.
- Grab some acoustical sealant (it’s also called acoustical caulk) and seal every single joint. We’re talking where the drywall meets the floor, the ceiling, and all your corners.
- Unlike regular caulk, acoustical sealant stays rubbery and flexible. That means it won’t crack over time from all those drum vibrations, keeping your room airtight.
- Don’t forget the electrical outlet boxes and light switches! These are notorious sound leakers. Put putty pads around the boxes before drywall, then seal around the finished outlets/switches with acoustical sealant where they meet the drywall.
Soundproofing Windows: The Sneaky Sound Culprits
Windows are a nightmare for soundproofing, especially if you want natural light. For maximum sound isolation, honestly, no windows are the way to go in a dedicated drum room. But if you absolutely need one, and your neighbors are getting restless:
- Block ‘Em Off: The most effective DIY move is to just seal the window opening completely. Use layers of soundproofing materials like MLV, thick plywood, and drywall to create a permanent, sealed barrier.
- Triple-Pane Glass (If You’re Rich): You can get special triple-pane windows that offer some sound reduction, but they’re expensive and still won’t be as good as a solid wall.
- Don’t want to kiss your natural light goodbye forever? For those intense, late-night rock sessions, you can craft a removable window cover from rigid insulation that easily slides into place. Then, amp up the soundproofing by adding some killer soundproof curtains!
Soundproofing Doors: The Next Biggest Headache
Doors are another major weak point because, well, they open!
- Ditch Those Standard Doors: Your typical flimsy hollow-core interior doors are basically sound sieves. They gotta go.
- Go Big and Solid:
- A single, super heavy, solid door is a great start. Think solid-core doors or even custom-built ones with cabinet-grade plywood. Some hardcore DIYers even put sheet lead inside their custom doors for extreme mass! Aim for a door that weighs around 300 lbs for real soundproofing – you’ll need heavy-duty hinges for that beast.
- Double Up! (Communicating Doors): For serious drum soundproofing, this is the way. Install two solid-core doors with an air gap between them. One door on the inside of the frame, one on the outside. This creates a “sound lock” effect that boosts your sound isolation big time.
- Trying to tackle this on a budget? Here’s a killer pro tip: Use exterior doors! They’re already built from heavier, more substantial material and are insulated for both security and keeping your inside temperature just right. Total win-win!”
- Seal EVERYTHING Around the Door: This is non-negotiable!
- Weather Stripping: Put high-quality weather stripping all around both doors to seal the gap between the door and the frame.
- Magnetic Weather Stripping: If you want an even tighter seal, magnetic strips are awesome.
- Door Seal Kits: These kits are your secret weapon. They include specialized seals for the top, sides, and a sweep for the bottom of the door.
Soundproofing the Floor and Ceiling: Don’t Forget Up and Down!
Sound and vibrations don’t just go sideways; they love to travel up and down too. Especially those good drum vibrations!
- Floor Power-Up:
- Mass Loaded Vinyl (MLV): Lay down some MLV right under your drum set. This helps absorb those vibrations before they shake the whole house.
- Decoupled Drum Riser (The Floating Floor Dream): This is the ultimate move for killing structural vibrations from your drums. You literally build a separate platform for your drum set, creating an “air void” between it and your main floor. It’s like building a “room within a room” just for your drums! This floating floor isolates your drum vibrations from the rest of your building’s structure. You can use layers of plywood, Green Glue, and rubber isolation pads to build this bad boy.
- Ceiling Smarts (If You Have Neighbors Above or Below):
- Decoupled Ceiling System: If there’s a room above your drum studio (or if you’re in a basement and want to stop sound from cruising upstairs), your ceiling needs the same decoupling and mass treatment as your walls.
- Use a hat channel system with resilient clips (like isolation clips) to separate your ceiling drywall from the joists above.
- Just like the walls, put in multiple layers of 5/8-inch drywall with Green Glue in between.
- Fill those ceiling joist cavities with dense mineral wool insulation.
- And don’t forget to seal all the perimeter joints with acoustical sealant! Every little crack counts.
Keeping It Cool: Heating, Cooling, and Ventilation
Your soundproof room is gonna be airtight, which is great for blocking sound but not so great for breathing or staying comfy. You’ll need some dedicated systems for fresh air and temperature control.
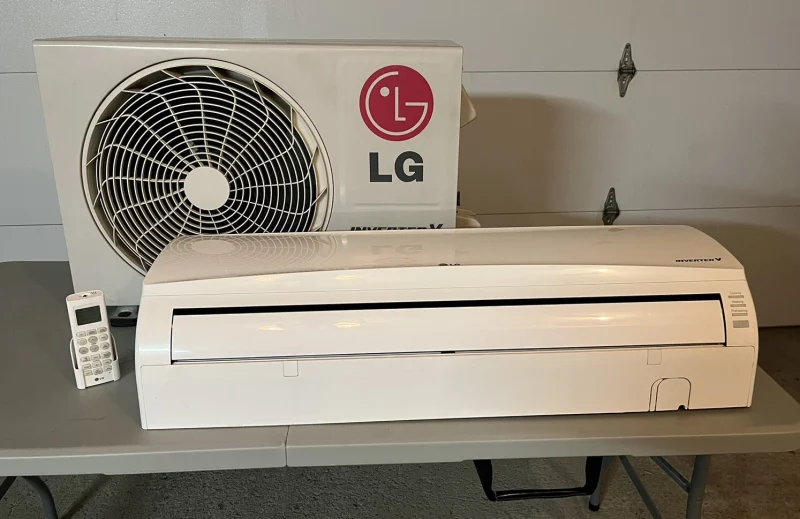
- Heating and Cooling: A quiet mini-split HVAC system is a popular choice for DIYers. They’re usually pretty easy to install yourself, super efficient, and quiet enough that they won’t mess up your hard-earned soundproofing.
- Ventilation: An Energy Recovery Ventilator (ERV) system is essential. An ERV pulls in fresh air from outside and kicks out stale air from inside, all while saving you energy by recovering heat or coolness. This keeps your air quality good without letting sound leak out. These systems usually connect to special “baffle boxes” (which are basically sound traps) that let air flow but block noise.
Beyond Soundproofing: Making Your Studio Sound Great
Alright, you’ve done the hard part: stopping the sound from getting out. But once your room is soundproofed, it might feel a little “dead” or have weird echoes inside. That’s where acoustic treatment comes in – it’s all about making the room sound amazing for you.
After you’re done with your soundproofing fortress, think about adding:
- Acoustic Panels: Made from fiberglass or mineral wool, these things soak up sound reflections, killing annoying echoes and reverb.
- Bass Traps: Crucial for managing those booming low frequencies that tend to build up in corners, making your drums sound muddy.
- Diffusers: These cool panels scatter sound reflections, making your room sound more natural, spacious, and less “boxy.”
- Soft Stuff: Carpeting, thick curtains, and furniture can also help absorb some sound and make the room more comfortable.
Bonus: Temporary Soundproof Barrier
Looking for a temporary soundproof barrier? If you’re not ready to fully commit an area long-term to rocking out on those drums and want an easy solution, consider using Insulated Concrete Forms (ICF).
ICF blocks are double-walled and stack like LEGO bricks, making them easy to put up and take down. While they’re primarily used for creating highly insulated, durable, and energy-efficient foundation walls in permanent construction—typically filled with rebar and concrete in that application—for your purpose, we recommend just stacking them as they come (not filling the void). You can even zip-tie them together if needed for extra stability. They’re readily available at your local building supplier or hardware store; just ask for ICF blocks, and they’ll know exactly what you need.
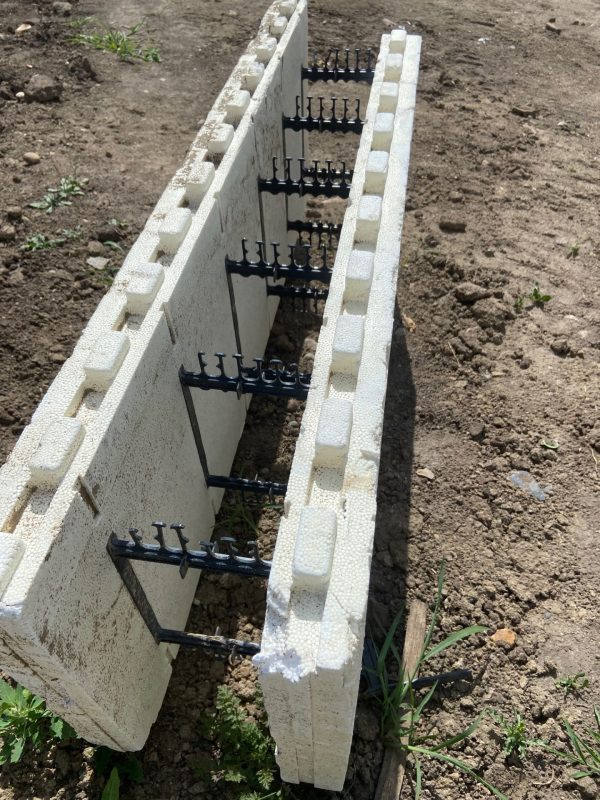
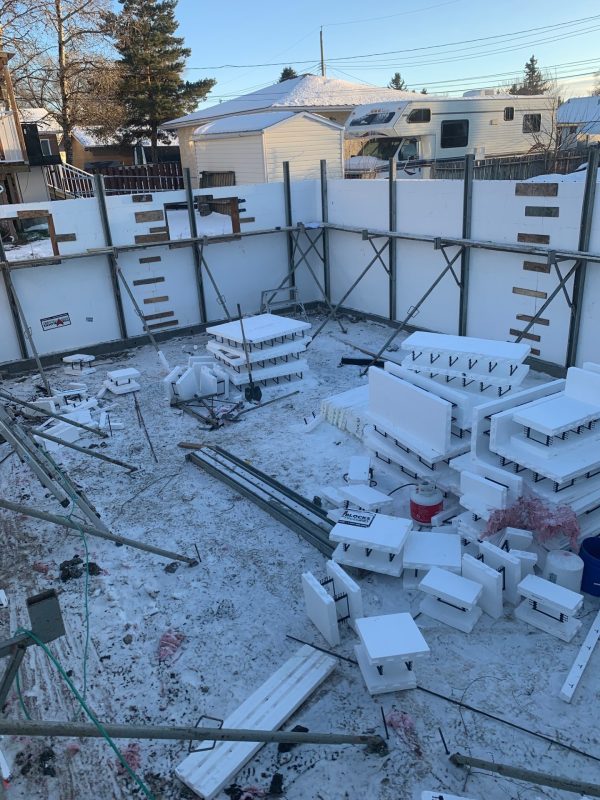
For your temporary (or even long-term) soundproof studio, we recommend cutting off the nibs on the bottom run. For the top connection to your ceiling, go up as high as you can and fill the remaining space with rigid insulation to create a complete seal.
Another significant advantage of using ICF for this purpose is that they come with plastic connectors designed for screwing into. This makes them a fantastic place to hang your acoustic panels and bass traps. ICF barriers go up quickly and are also easy to tear down, allowing you to use them again and again.
Conclusion: Rock Out in Your New Noise-Free Studio!
Look, soundproofing a room for drums is a big project, no doubt about it. But with solid planning, the right materials, and a bit of sweat equity, it’s totally doable. By focusing on mass, decoupling, damping, and sealing every tiny crack, you can create a truly isolated space. Remember, every little detail matters, from sealing tiny cracks to making sure those resilient channels are installed perfectly.
The time and money you put in now will pay off huge, giving you the freedom to practice, record, and create whenever inspiration strikes, without a single worry about noise complaints. You’ll have that ultimate, noise-free studio you’ve been dreaming of, ready to record those epic drum tracks!

