This post may contain affiliate links which means we may receive a commission for purchases made through links. Learn more
By Matt Donald
You’ve done it. Your band is playing like fiends – it’s perfect. But a perfect performance on stage or in the studio isn’t just about flawless playing; it’s about flawless capture. Just as hardware fails can derail a gig, so too can a poorly miked drum kit. No matter how well you play, if your sound isn’t translated effectively to the audience or the recording, your efforts fall flat.

This is where overhead microphones become crucial. Far from being just “cymbal mics,” overheads are the foundational element of professional drum recording and live sound. They act as the essential glue, capturing the entire kit’s natural balance, ambience, and stereo image. They combine and level out the kit from left to right, back to front, and even top to bottom, making these dimensions vital for a cohesive, powerful drum sound.
While no two sessions are ever the same – every room, kit, and drummer is unique – there are tried-and-true rules-of-thumb that consistently yield excellent results. These fundamental overhead mic techniques are the bedrock upon which truly impactful drum sounds are built.
Join me as we explore the three most vital overhead drum mic placements: the X-Y configuration, Spaced Pair placement, and the ORTF technique. Understanding these will equip you with the knowledge to capture your drums with clarity, depth, and that professional polish you’re striving for.
1. The X-Y Configuration
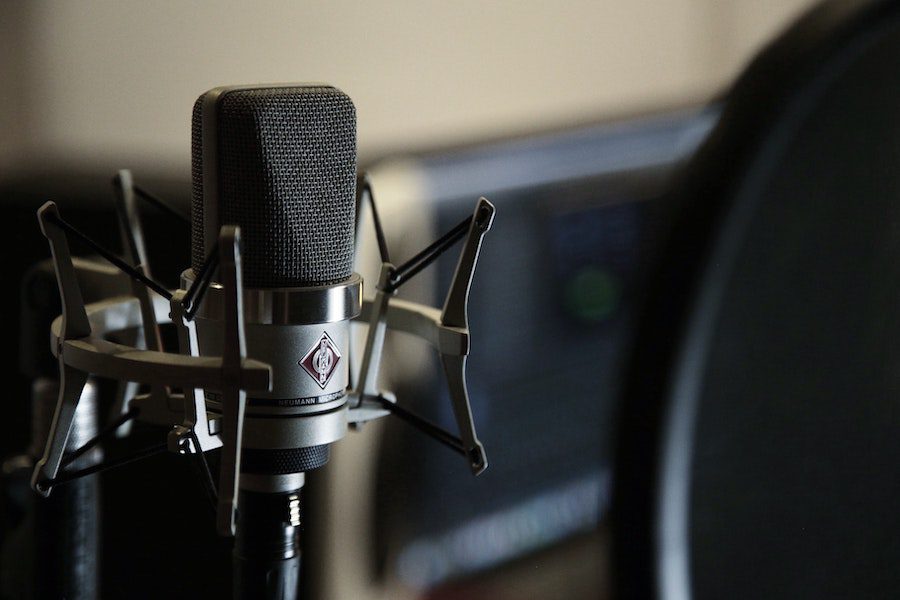
The X-Y configuration is a widely adopted stereo miking technique known for its excellent mono compatibility and focused sound. It’s an ideal starting point for many engineers due to its relative simplicity and reliable results.

What It Is & Setup: The X-Y setup uses two identical cardioid condenser microphones. Their capsules are placed as close to each other as possible – ideally touching or overlapping – with their diaphragms angled at 90 degrees to each other. This creates a coincident pair, meaning sound reaches both capsules at virtually the same time, minimizing phase issues.
Place the X-Y pair high above the cymbals, ensuring they are also positioned directly above or slightly in front of the snare drum. The height is crucial: too low, cymbals dominate; too high, clarity suffers. A common starting point is 3 to 4 feet above the snare, aiming the “center” of the X directly towards the snare drum to anchor it in the stereo field. A dedicated stereo bar is highly recommended for precise and repeatable setups.
Advantages:
- Excellent Mono Compatibility: The greatest strength. Because sound reaches both capsules simultaneously, there are virtually no time-of-arrival differences to cause phase cancellation when summed to mono. Your drums sound full and consistent across various playback systems.
- Focused and Clear Sound: The coincident placement results in a sharp, well-defined stereo image with precise attacks. Less “washiness” compared to spaced setups.
- Phase Cohesion: Minimal phase issues make it easy to blend overheads seamlessly with individual close mics (kick, snare, toms) for a fuller, impactful drum sound.
- Less Room Tone: Being closer together, they pick up less room ambience, an advantage in smaller or acoustically challenging spaces.
Disadvantages:
- Less “Air” or Width: The stereo image is more contained compared to spaced techniques.
- Critical Placement: Small height or angle adjustments can significantly alter the drum-to-cymbal balance.
Ideal Applications:
- When excellent mono compatibility is paramount (broadcast, streaming).
- Limited track count recording setups.
- Smaller rooms or untreated home studios.
- Genres like jazz, acoustic music, or pop where a tight, defined, and clear drum sound is preferred.
Check it out on youtube
2. Spaced Pair Placement
The spaced pair technique is a classic approach to overhead miking, beloved for its ability to create a wide, immersive, and often larger-than-life stereo image of the drum kit.

What It Is & Setup: A spaced pair uses two microphones, typically cardioid condensers, separated by a significant distance (e.g., 3 to 6 feet apart). This technique relies on time-of-arrival differences to create its stereo spread.
Place the microphones high enough above the cymbals to capture a balanced kit sound, generally 3 to 5 feet above. The most crucial rule is the Equidistant Rule: Each overhead microphone must be placed at an equal distance from a central point on the drum kit, most commonly the snare drum or the center of the kick drum. Use a tape measure or string from the snare center to each mic capsule, adjusting until distances are identical. This anchors the kick and snare firmly in the center of your stereo image. The larger the distance between the mics, the wider the stereo image you’ll achieve.
Advantages:
- Exaggerated Stereo Spread: Creates a vast, expansive, and immersive sound field. Ideal for achieving a “big” and “wide” drum sound.
- More “Air” and Room Sound: Wider placement captures more of the room’s natural ambience and reflections, adding depth and natural reverb, especially in a great-sounding recording space.
- Natural Feel: Can sound very much like standing in front of a live drum kit, offering realism and presence.
Disadvantages:
- Phase Issues: The biggest challenge. Time-of-arrival differences can cause comb filtering and hollowness, especially if the equidistant rule isn’t strictly adhered to. This makes it less ideal for mono summing.
- Room Dependency: Thrives in good-sounding rooms. In poor acoustic spaces, it will pick up and emphasize undesirable reflections.
- Less Focused Center Image: Kick and snare might feel slightly less anchored than with X-Y.
Ideal Applications:
- When a wide, expansive, and immersive stereo image is the primary goal.
- In recording studios with excellent acoustic treatment and desirable natural reverb.
- For genres like rock, metal, or anything requiring a larger-than-life drum sound.
Pro Tip: Even with careful equidistant placement, slight phase issues can occur. In post-production, consider using phase alignment plugins to subtly shift the timing of one overhead track relative to another, or to your kick/snare close mics, maximizing sound. Explore the famous Glyn Johns technique as a two-mic spaced pair variation.
Check it out on youtube
3. The ORTF Technique
The ORTF technique offers a compelling middle ground, blending the focus of X-Y with the width of a spaced pair. Developed by French public radio, it’s designed to mimic how human ears perceive sound, resulting in a natural and realistic stereo image with good depth.

What It Is & Setup: ORTF is a near-coincident stereo technique using two matched cardioid condenser mics. Their capsules are spaced precisely 17 cm (approx 6.7 inches) apart and angled at 110 degrees relative to each other. This specific combination creates both time-of-arrival and intensity differences, yielding a coherent and pleasing stereo field.
Position the ORTF pair high above the drums (around 3 to 4 feet above the snare), similar to X-Y. The aiming point is usually towards the center of the drum kit, slightly in front of the snare, to capture a balanced overall sound. A dedicated ORTF stereo bar is almost essential for reliable and repeatable results.
Advantages:
- Wider Stereo Spread than X-Y: The slight spacing creates a more expansive, dimensional stereo image than X-Y.
- Better Mono Compatibility than Spaced Pair: While not perfect, it’s significantly better than a wide spaced pair due to minimal time differences, making it versatile.
- Good Sense of Space and Depth: Excels at capturing the spatial characteristics of the kit and room, providing a natural sense of depth without being overly washed out.
- Natural Imaging: Designed to replicate human hearing, the resulting stereo often sounds incredibly realistic.
Disadvantages:
- Less Extreme Width than Spaced Pair: If extreme width is your primary goal, ORTF might not be enough.
- Less Pinpoint Focus than X-Y: The slight spacing can lead to a slightly less razor-sharp image.
- Requires Precision: Adherence to the 17 cm spacing and 110-degree angle is critical for the technique to work as intended.
Ideal Applications:
- When a natural, believable, and cohesive stereo image with good width and depth is desired.
- Situations where good mono compatibility is still a concern, but a wider stereo field than X-Y is preferred.
- Capturing the overall drum kit ambience in a decent-sounding room.
Check it out on youtube
Live Overhead Drum Set-up: Studio vs. Stage Nuances
The miking of your drum kit for a live performance, whether on a small stage or a stadium, shares fundamental principles with studio recording, but the intention behind the sound differs significantly.

In the studio, the goal is to capture the purest, most detailed sound the drums produce for an immersive recording. Overheads are often the main event, augmented by close mics. Live, the goal is about sound impact and reinforcement for the audience, often amidst other loud instruments.
Overheads’ Role Live:
- Reinforcement & Projection: Live, you’re amplifying to project the drums clearly. This relies heavily on close-miking.
- Cymbal Sparkle & Wash: Overheads’ most common role live is to provide the shimmer of the cymbals, which often get lost in a loud mix otherwise.
- Subtle Kit “Glue”: While close mics deliver the punch, overheads can provide a subtle ambient layer, “gluing” the kit together for a more natural feel.
- Reducing Spillover: A major challenge live is minimizing bleed from other instruments. Live overheads (often large-diaphragm condensers or even dynamics) need to be chosen and placed to reduce spill, focusing on direct drum sound.
- Strategic Placement: Even if close mics are dominant, well-placed overheads provide crucial top-end detail and overall “air.” They should still aim for a balanced stereo image, perhaps positioned a bit closer than in the studio to maximize direct sound.
Beyond Placement: Choosing Your Overheads
Beyond mastering placement techniques, the choice of microphone significantly impacts your final sound. Selecting the right overheads is crucial for capturing your drum kit’s nuances. Certain microphones have become trusted companions for their clarity, durability, and sonic character, perfect for overhead applications both in the studio and live.
For a detailed breakdown of specific overhead microphones, including their strengths, ideal applications, and price points, explore our companion articles on Drumtronix.com.
Final Advice: Listen, Adapt, and Experiment
While these overhead mic placement techniques provide an invaluable roadmap, the true art of capturing great drum sound lies in your ears and your willingness to experiment.
Always work with the drummer’s hitting habits and manipulate your overhead mic positioning to complement their playing style. Is the drummer heavy on cymbals? Adjust height. Is the kick lacking clarity? A slight shift might enhance it. Listen to the phase relationship between your overheads and close mics; a quick polarity flip can be a savior.
No two drummers, kits, or rooms are exactly alike. That’s the beauty and challenge. Armed with the knowledge of X-Y, Spaced Pair, and ORTF, you have powerful tools at your disposal. Now, go forth, listen critically, adapt creatively, and experiment relentlessly. Your perfect drum sound awaits!